Abisko’s AI-driven utility bill reading accurately extracts consumption and cost data from utility bills and syncs entries directly with Energy Star Portfolio Manager and other platforms. Users can locally-train extraction models for individual meters to ensure accurate and consistent readings.A portfolio-level switchboard also supports bulk processing of bills across portfolios to streamline monthly data ingestion workflows. Dozens of utility bill PDFs and images can be processed simultaneously and synced data across meters and systems.
For ESPM meters, click Edit Meter and check the ESPM Push box to enable 2-way syncing and AI-driven data extraction.
2
Click the Add Entry button
Open the meter consumption entry panel.
3
Upload a utility bill PDF or image
Click Upload Attachment to open the file menu and select the bill for upload.
4
Train the AI
If this is the first time uploading a bill for the meter, then the AI model will need to be trained. To start, click the Add markup button above the view panel.
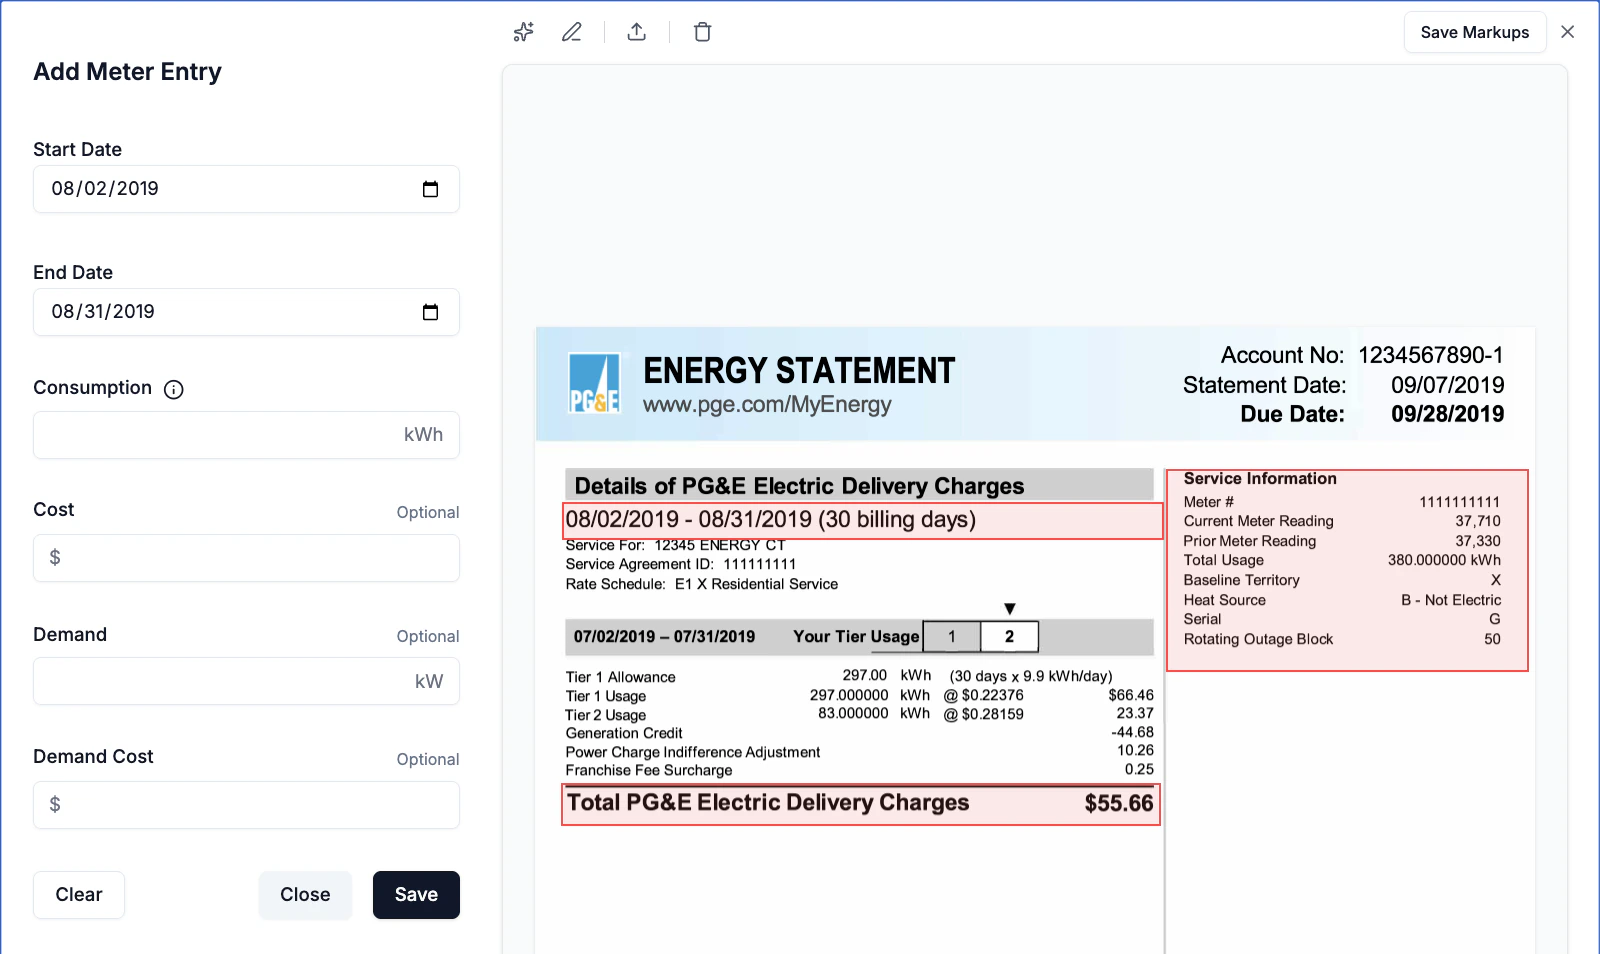
After clicking Add markup, a red box will show up on the page of the bill currently in view. Drag and resize the box to cover any area of the bill where target data is located. For target data located across different sections of the bill, draw multiple red boxes by clicking the Add markup button again. Click Save Markups at the top-right of the panel after each box is drawn to ensure everything is saved.Use the navigation menu at the bottom to view other pages in the file where target data may be located (e.g. consumption data is often on page 2 or 3 of utility bills). The red boxes should cover all the locations in the bill with target data and nothing more. This includes:
Statement Periods (e.g. start date to end date associated with consumption)
Total Consumption
Total Cost
Demand (if applicable)
Example of red boxes drawn around billing dates, consumption and cost values.
If multiple meters are included in the bill, then users should only draw boxes around the values associated with the meter for which data is being extracted. Alternately, users can choose to extract account-level totals instead of individual meter values.Once the final boxes are saved, the meter is trained and the boxes will automatically be drawn for all subsequently uploaded bills and entries.
5
Extract the data
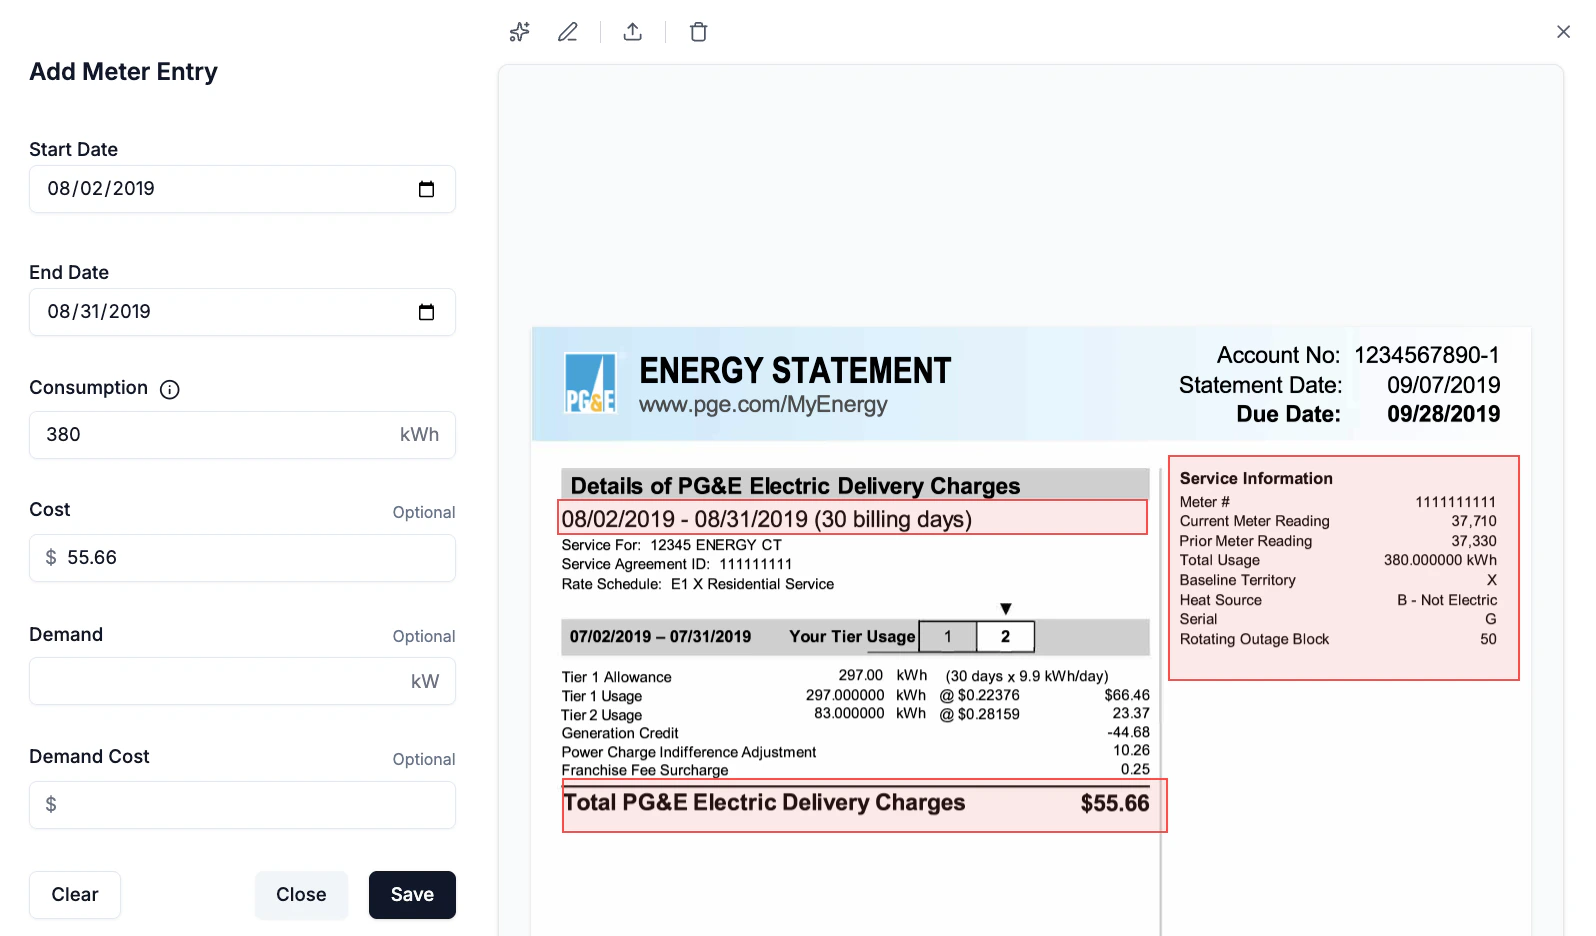
If the meter is already trained, then red boxes will automatically highlight sections of the new bill where they were previously saved. Quickly review to ensure the boxes are drawn in the correct locations.
If the red boxes highlight the wrong areas of the bill, then the bill format has likely changed and the boxes should be redrawn and saved.
Click the Read with AI button in the menu above the view panel.
The AI tool will automatically extract the data located in the red boxes and populate the corresponding fields in the left panel.
6
Save and sync the entry
Click the Save button to close the panel and save the file to the entry for future reference.
For ESPM meters, the consumption entry will automatically be synced.
Property and portfolio-level performance and data quality metrics across the platform will automatically be reprocessed and updated after saving the entry.
Each meter must be individually trained by drawing and saving the red boxes the first time that AI-driven data extraction is leveraged. Subsequent entries and bill uploads for trained meters will always use previously saved configurations to focus the AI on the target data and streamline extraction by allowing users to immediately click the Read with AI button.